DIY Fiber Glassing
DIY Fiberglassing: A Comprehensive Guide to Fiberglass Projects
Introduction:
Fiberglass is a versatile and lightweight material used in various applications, including automotive, marine, and construction projects. Its high strength-to-weight ratio, resistance to corrosion, and affordability make it an ideal choice for many do-it-yourself (DIY) enthusiasts. This comprehensive guide will cover the essential aspects of DIY fiberglassing, from understanding the materials to the step-by-step process of creating your own fiberglass project.


Understanding Fiberglass and its Components:
Fiberglass is a composite material made up of glass fibers embedded in a resin matrix. The combination of these materials results in a strong, lightweight, and durable product. The two main components of fiberglass are:
a. Glass fibers: Thin strands of glass that provide strength and flexibility to the composite material.
b. Resin: A liquid polymer that hardens when combined with a catalyst, encapsulating the glass fibers and providing rigidity and resistance to the final product.
Essential Tools and Materials for DIY Fiberglassing:
Before starting your fiberglass project, it's crucial to gather the necessary tools and materials. Here is a list of essential items you will need:
a. Fiberglass cloth or mat: The base material for your project, available in different thicknesses and weave patterns.
b. Resin: Polyester or epoxy resin, depending on your project's requirements.
c. Catalyst or hardener: A chemical agent that initiates the curing process of the resin.
d. Mixing containers: For mixing resin and catalyst.
e. Brushes and rollers: For applying resin to the fiberglass.
f. Acetone: For cleaning tools and surfaces.
g. Gloves, safety goggles, and a respirator: For personal protection against fiberglass particles and fumes.
h. Sandpaper and a sanding block: For preparing surfaces and smoothing the finished product.
i. Scissors or a utility knife: For cutting fiberglass cloth or mat.
Preparing the Workspace:
Working with fiberglass can be messy and generates fine dust particles that can irritate the respiratory system. To ensure safety and ease of cleanup, prepare your workspace by:
a. Choosing a well-ventilated area.
b. Laying down drop cloths or plastic sheeting to protect surfaces.
c. Having a designated area for mixing resin and catalyst.
d. Wearing appropriate protective gear, including gloves, safety goggles, and a respirator.
Step-by-Step Guide to DIY Fiberglassing:
Step 1: Surface Preparation
Prepare the surface by cleaning it thoroughly, removing any dirt, grease, or debris. Sand the surface to create a rough texture, which allows better adhesion for the fiberglass.
Step 2: Cutting Fiberglass Cloth or Mat
Measure and cut the fiberglass cloth or mat to the desired size, allowing for some overlap on the edges. It's essential to wear gloves during this step to avoid skin irritation from the fiberglass fibers.
Step 3: Mixing Resin and Catalyst
Following the manufacturer's instructions, mix the resin and catalyst in a container. Be cautious not to mix more than you can apply within the resin's pot life (working time).
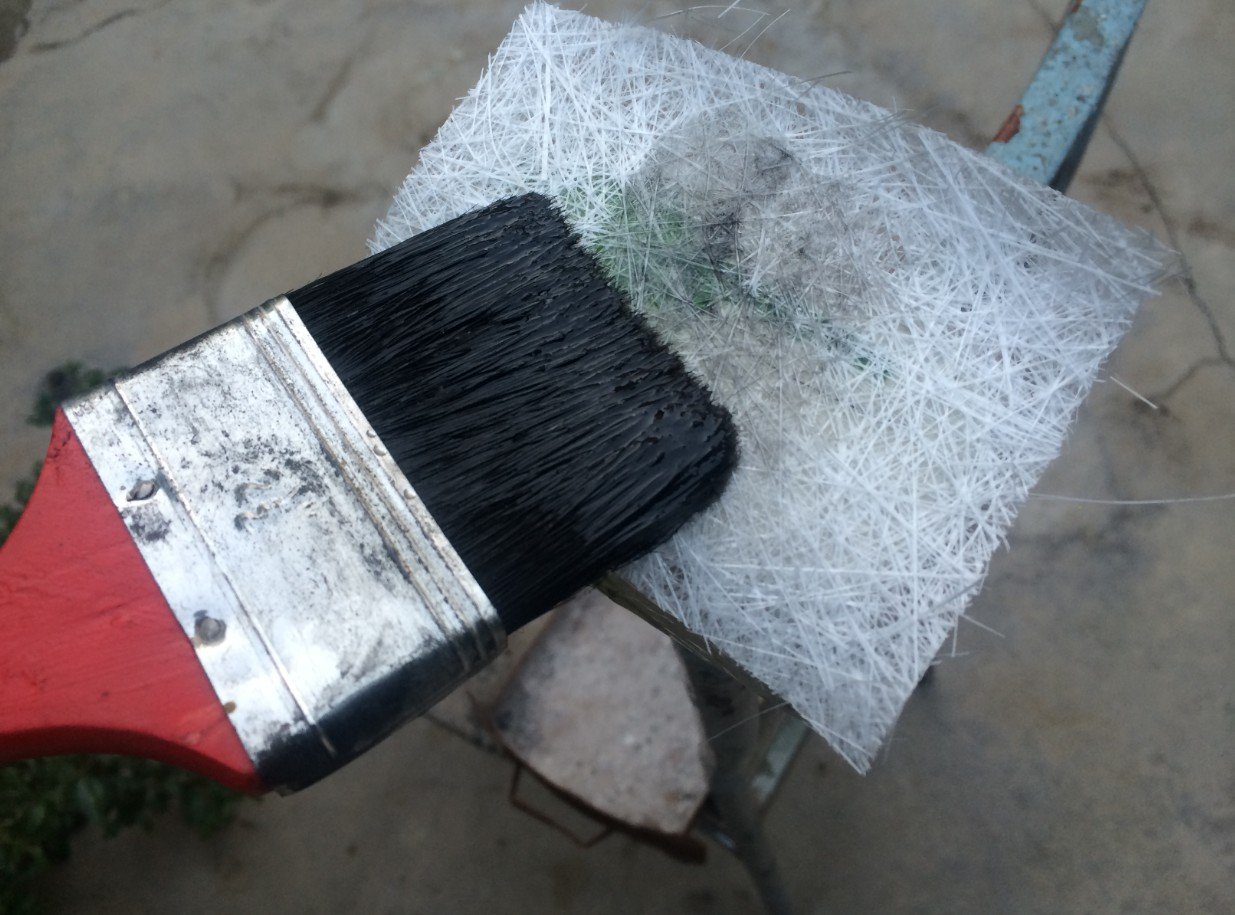
Step 4: Applying Resin to Fiberglass
Using a brush or roller, apply a thin layer of resin to the surface. Place the fiberglass cloth or mat onto the wet resin and smooth out any wrinkles or air bubbles. Apply more resin on top of the fiberglass, ensuring complete saturation.
Step 5: Adding Layers
For projects requiring multiple layers of fiberglass, repeat steps 4 and 5 until the desired thickness is achieved. Allow each layer to cure slightly before applying the next one.
Step 6: Curing
Allow the fiberglass to cure according to the manufacturer's instructions. The curing time may vary depending on factors such as temperature, humidity, and the type of resin used. Generally, it takes between 24-48 hours for the resin to fully harden.
Step 7: Trimming and Sanding
After the fiberglass has fully cured, use a utility knife to trim off any excess material. Sand the fiberglass surface with sandpaper, starting with a coarse grit and gradually moving to finer grits for a smooth finish. Be sure to wear appropriate protective gear, as sanding will generate dust particles.
Step 8: Finishing Touches
For a professional appearance, you can apply paint, gel coat, or other finishes to the fiberglass surface. Follow the manufacturer's instructions for proper application and drying times.
Step 9: Cleanup
Clean your tools and workspace with acetone, ensuring all resin and fiberglass particles are removed. Dispose of any waste materials according to local regulations.
Conclusion:
DIY fiberglassing can be a rewarding and cost-effective way to create custom projects at home. By understanding the materials, gathering the necessary tools, and following the step-by-step process outlined in this guide, you can successfully complete a variety of fiberglass projects. Always remember to prioritize safety and work in a well-ventilated area to ensure a successful and enjoyable DIY experience.
Posted by Ali Aslan at Sunday 7th of May 2023 04:58:26 PM